Do you ever look at your board game collection and feel stressed by the number of games on your shelf? Are they reminders of how much money you've sunk into them, only for them to be unplayed and unappreciated? Or maybe you've inherited a bunch of board games that you don't have space for?
The answer might be to sell them off!
Over the last few years, I've sold and traded upwards of 100 board games from the comfort of my own home. That's right, I don't even have to leave the house! It's easy, practical, and a great way to free up space on my shelf and recoup money that I can use to buy more board games.
With a bit of time, guidance, a printer, and some free/cheap shipping materials, YOU can also sell your used board games online without much hassle. Here's a complete step-by-step guide on how to sell your used board games. I'll outline everything I've learned and show you exactly how I do it. It's a lot easier than you might think. I promise!
Where to Sell Your Used Board Games
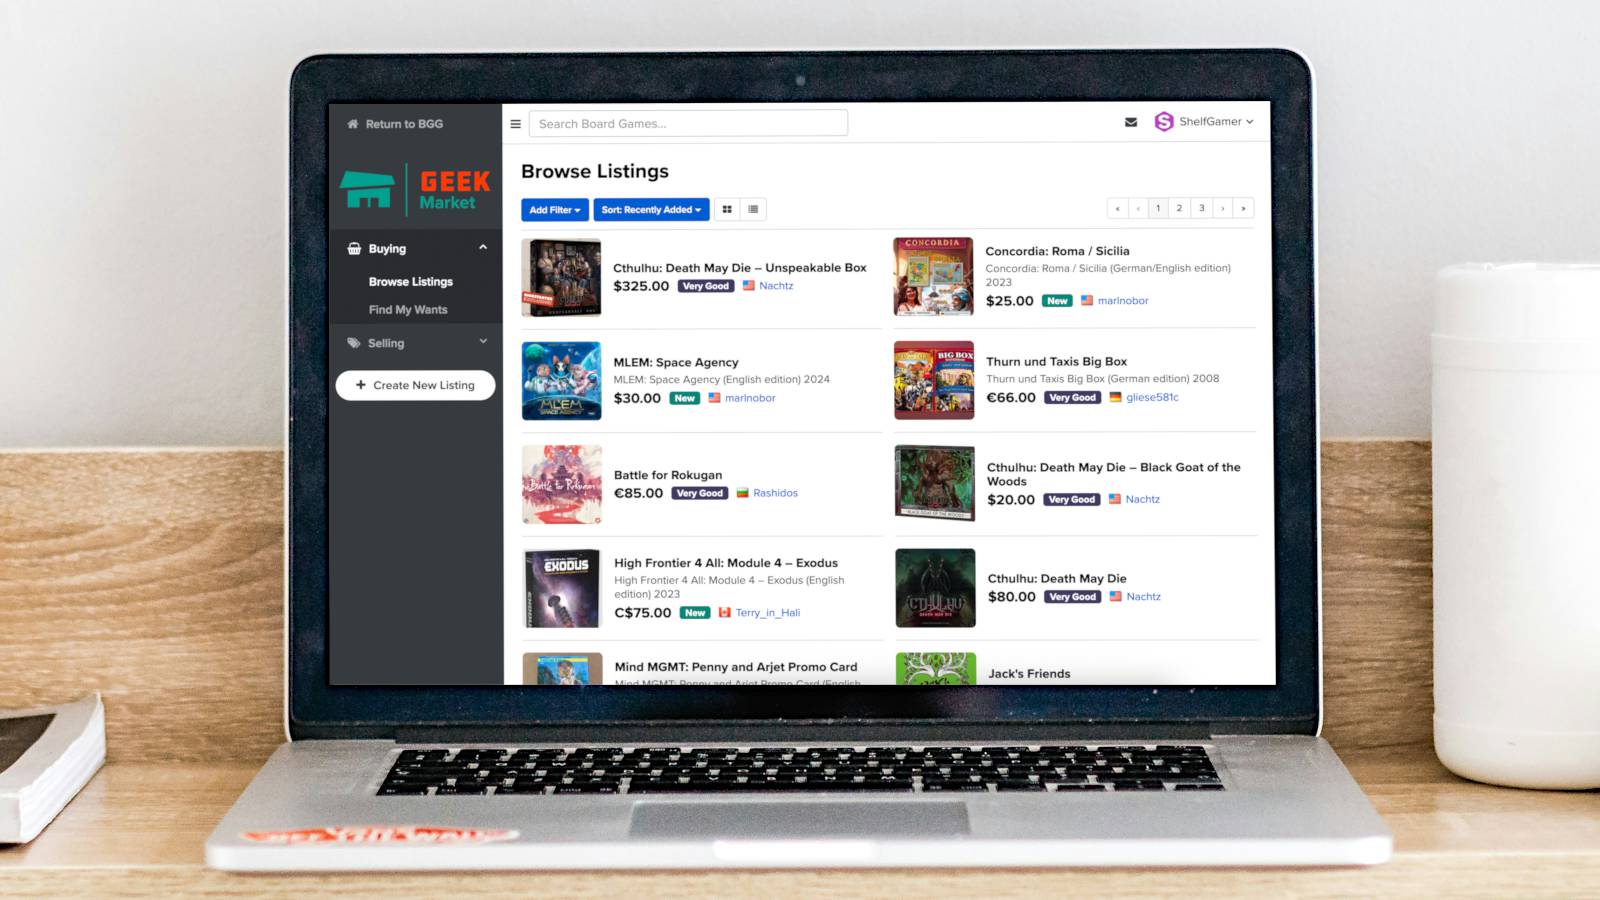
When it comes to selling used board games online, you have a few options of where to sell them—but if you don't have much experience selling online and/or this is your first time shipping things to people, you should stick with BGG's GeekMarket.
GeekMarket is BoardGameGeek's informal marketplace where anyone can list their board games for sale. It's free to list your games there; once a game sells, you'll be charged a 3% fee that can be paid using PayPal. (This fee is for providing a central marketplace for board games and bringing eyeballs to your board game for sale.)
GeekMarket's 3% fee is based on a game's selling price and doesn't include shipping. This fee is extremely reasonable! Compare it to eBay, which charges a whopping $0.30 + 13.25% on board games.
When someone comes across your listing and decides to buy, they'll send you a private message (called "GeekMail"). From there, you go back and forth to negotiate payment and get their shipping address. Then, you ship it out.
I've sold on GeekMarket, eBay, and Mercari. Between them, I've had the best experience selling on GeekMarket, where the buyers tend to be more knowledgeable about board games and more understanding in general. I've all but given up on eBay and Mercari and now focus my efforts solely on GeekMarket.
The rest of this guide will be geared towards GeekMarket, but most of the information can also be applied to eBay, Mercari, and other online marketplaces.
Step 1: Assessing Price and Condition
Price is the most important decision when selling. If your listing price is too high, everything else is pointless. No one wants to buy an overpriced game, especially if it's opened and used and potentially damaged. Then again, you don't want to sell too cheaply and lose out on a big chunk of change, either.
Here are the exact steps I take when setting my prices:
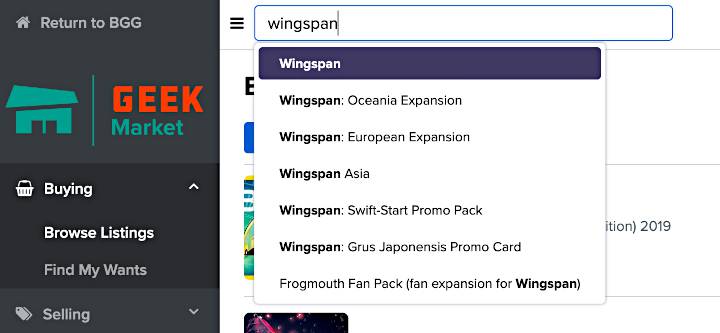
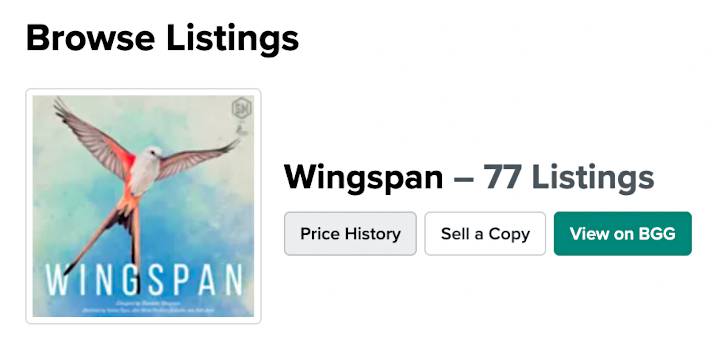
1. Go to GeekMarket's current listings for the game. Head over to GeekMarket and type in the name of the game in the top search field. Then, in the drop-down that appears, click on the game. (If there are multiple games with the same name, you'll have to be careful to click the right one.)
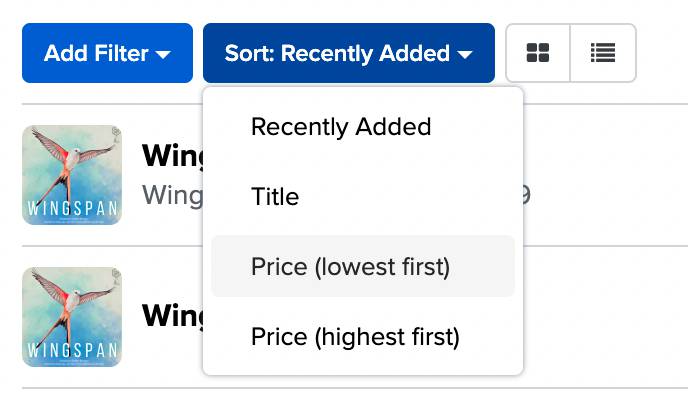
2. Sort by listing price and filter by country. Click on the Sort filter (which defaults to "Recently Added") and select "Price, lowest first" to re-sort the list with the cheapest listings at the top. Then, click Add Filter and select Country of Origin, then change the Country of Origin filter to "United States" (or your own country if otherwise).
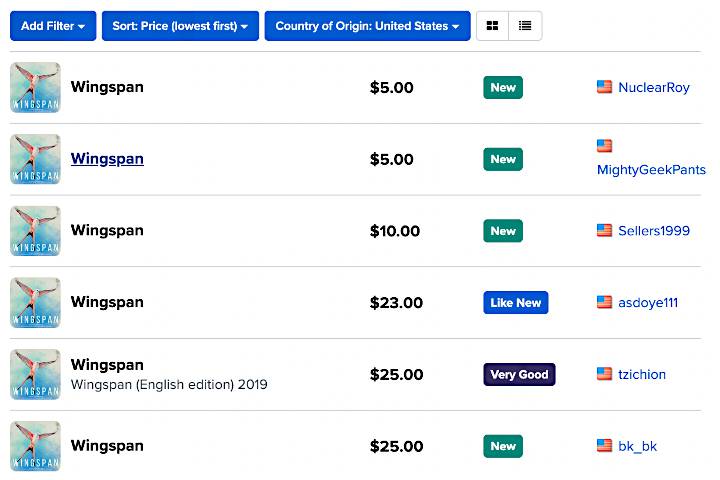
3. Scan the listings and ignore outliers. Sometimes, the listings under a certain game may not be selling the game itself; instead, the seller might be selling parts (e.g., extra tokens) or accessories (e.g., playmats). So, if you see Wingspan listed for $5, click into the listing and see if it's actually the game or not. (Most likely it isn't.)
Once you know which listings you can ignore, you'll be able to see what the game is currently selling for. If you want to sell, you'll need to price your game thus.
What if there aren't any listings for your game? In that case, you can price your listing in one of two ways—or you can do both and combine them to come up with a price that feels reasonable.
1. Look at the game's price history on GeekMarket. On the listings page, click the Price History button to see a full history of all sold listings for that game. For each listing, you'll be able to see the game's condition, sold price, and sale date.
The sold prices aren't always "reasonable." Maybe it was just for parts. Or maybe it was sold cheaply at auction or at an expo. You should check each sold listing and review the details of the sale, which you can do by clicking the link in the Item ID column for a given sale.
As long as you do your due diligence, these price histories can be a great way to see what people are willing to pay for your game.
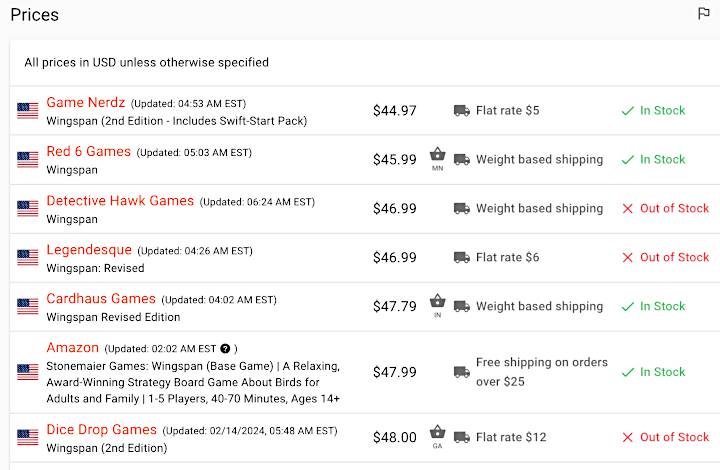
2. Compare to retail price and adjust downwards. If your game is still being sold by retailers, use their prices as an anchor and adjust downwards based on the condition of your game and the estimated shipping cost. (More on shipping later in this guide.)
To find the retail price of your game, go to Board Game Oracle and search for your game. Then, scroll down to see all current prices for that game at the most well-known board game retailers. For best results, use the cheapest price you see.
What Is Your Game's Condition?
GeekMarket lets you mark a specific condition for each game you list. These are the possible conditions and how each one is defined:
New — A brand new unused, unopened, and undamaged item in perfect condition. The original packaging and all materials are in brand new condition.
Like New — Item just removed from shrink wrap. No wear and tear, all facets are intact.
Very Good — Very minimal wear and tear. All materials are present. You would give this item to a friend as a gift.
Good — Minor damage to the box and/or its contents. All materials are present. Item may have been used once or twice.
Acceptable — Some damage to the box, but the item is still intact. Possible split corner(s) on the box. Maybe missing a non-crucial piece. Possibly missing rules/instructions, but are readily available on the web. Scuffing on the item.
Unacceptable — Major damage to box and its parts. Possibly missing several important pieces. Broken or missing board/box. No rules/instructions, and they are not readily available. Do not sell this item on the marketplace.
The New condition should be reserved for games that are still in shrinkwrap. However, in my experience, a game that's been played once or twice but shows no evidence of play can be listed as Like New. If you want to be safe, go for Very Good instead.
If the game components show wear and tear (e.g., cards are no longer pristine), you can opt for either Very Good or Good. If the game box has scuffing or worn corners or other blemishes, Very Good or Good. If the game box is noticeably damaged or game components are noticeably imperfect, Acceptable.
The golden rule when determining your game's condition:
When in doubt, underpromise and overdeliver. If you're stuck between two, go for the lesser one. It's better for the buyer if they're expecting issues but end up pleasantly surprised when the game reaches them.
Avoid marking a game as "Like New" just to sell it faster or to fetch a higher price. The buyer will get mad and cause all sorts of trouble for you. (It's not worth losing access to GeekMarket just to make a sale!)
Step 2: Taking Photos (Optional)
I've sold games with and without accompanying photos, so this step can be skipped if you don't have the time or desire to deal with it.
However! I've noticed that listings with photos sell much faster. Photos make your listings seem more legitimate and show exactly what buyers will be receiving, which instills confidence in buyers to pull the trigger.
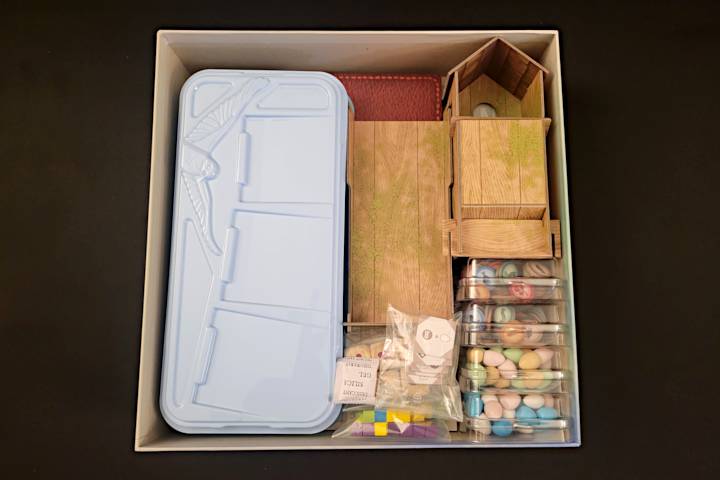
If you have a smartphone with a decent camera, you have all you need to take photos. The photos don't have to be grand or beautiful; they just need to show an overview of the components and the condition of the game box.
Tips for good board game photos:
- Place on a solid colored surface.
- Make sure the area is brightly lit.
- Organize and spread everything clearly.
- Take the viewer on a journey through the box. Show them that everything is in there and they have nothing to worry about.
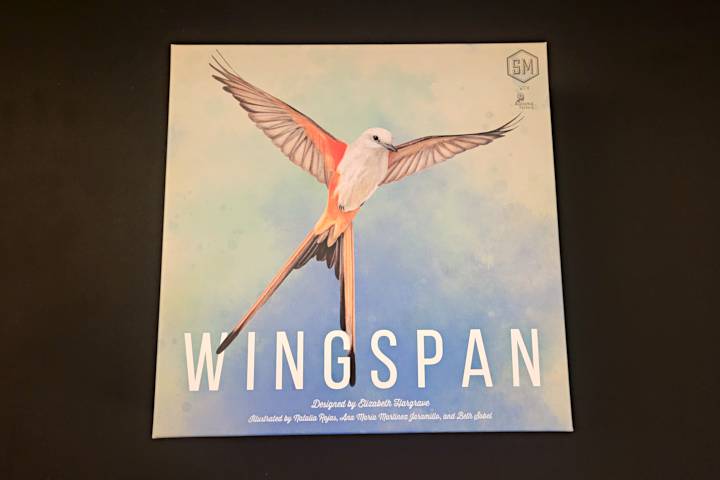
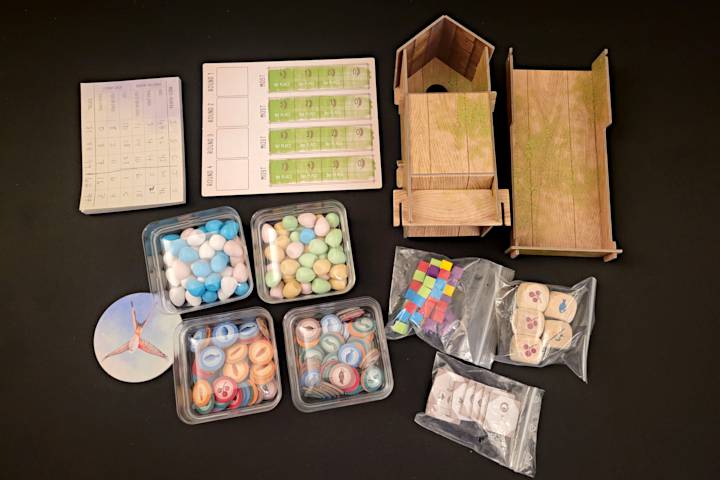
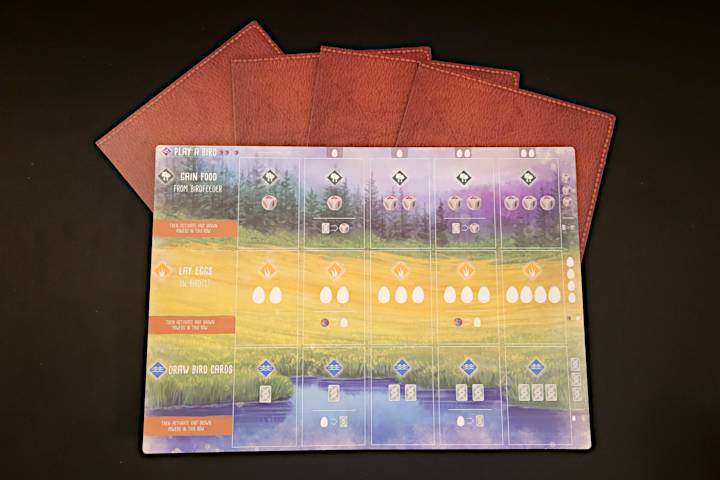
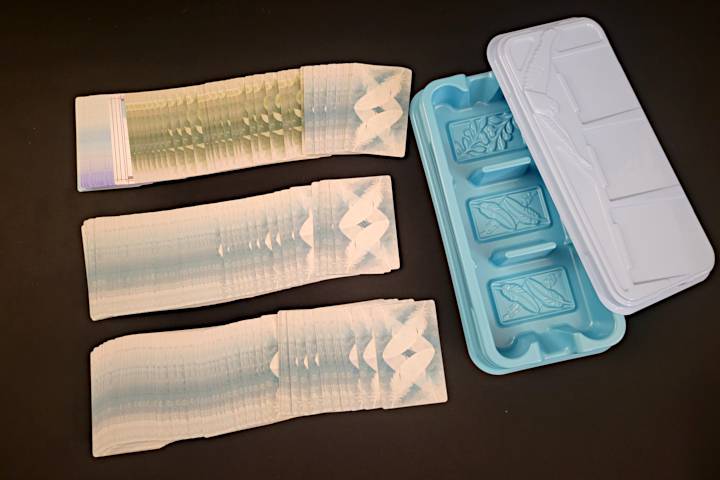
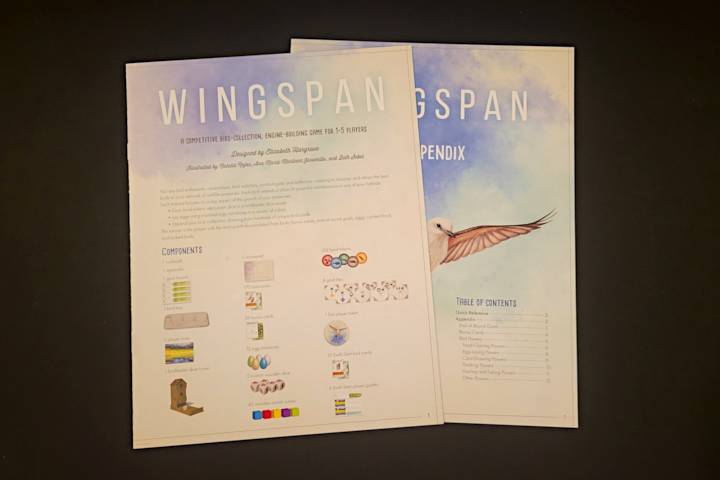
Here are the photos I'd take if I were to sell my copy of Wingspan:
Transferring Photos From Phone to Computer
In the next step, you'll be listing your game on GeekMarket—and I recommend doing that from your computer, so you'll need to transfer your photos over before you begin with the listing process.
There are lots of ways to transfer photos, but my favorite method involves a little Gmail trick that I stumbled upon a while ago:
1. If you don't have the Gmail app, install it. I've never tried doing this trick through a mobile web browser. It might work, it might not. If it doesn't, use the app.
2. Open the Gmail app and compose a new email. Address the email to yourself and fill in the subject line and body with whatever you want. Don't send the email yet, because you still need to...
3. Attach the photos to the email. Tap the paper clip icon and select all the photos you just took for your game. To select multiple photos at once, long-tap on the first photo to enter multi-selection mode, then tap on the rest.
4. Don't send! Save the email as a draft. You don't actually have to send the email for Gmail to upload and sync the attachments. Saving the email as a draft is enough, and you won't risk any issues with emailing yourself a bunch of photos.
5. Open the email draft on your computer. Switch to your computer, log into Gmail, and open your Drafts folder. You should see the draft. Open it and download all the attachments, saving the photos to your computer. Then, delete the draft.
Done! You're ready to move on.
Step 3: Listing on BGG's GeekMarket
If you don't have a BoardGameGeek account, you'll need to create one for free. Pick a username and enter your email address and a password. (Don't use a throwaway email address! Use an email address that you check daily so you can stay on top of notifications when buyers show interest.)
Once you're logged into BGG, head over to the GeekMarket and click the +Create New Listing button in the sidebar. (Or simply click here.)
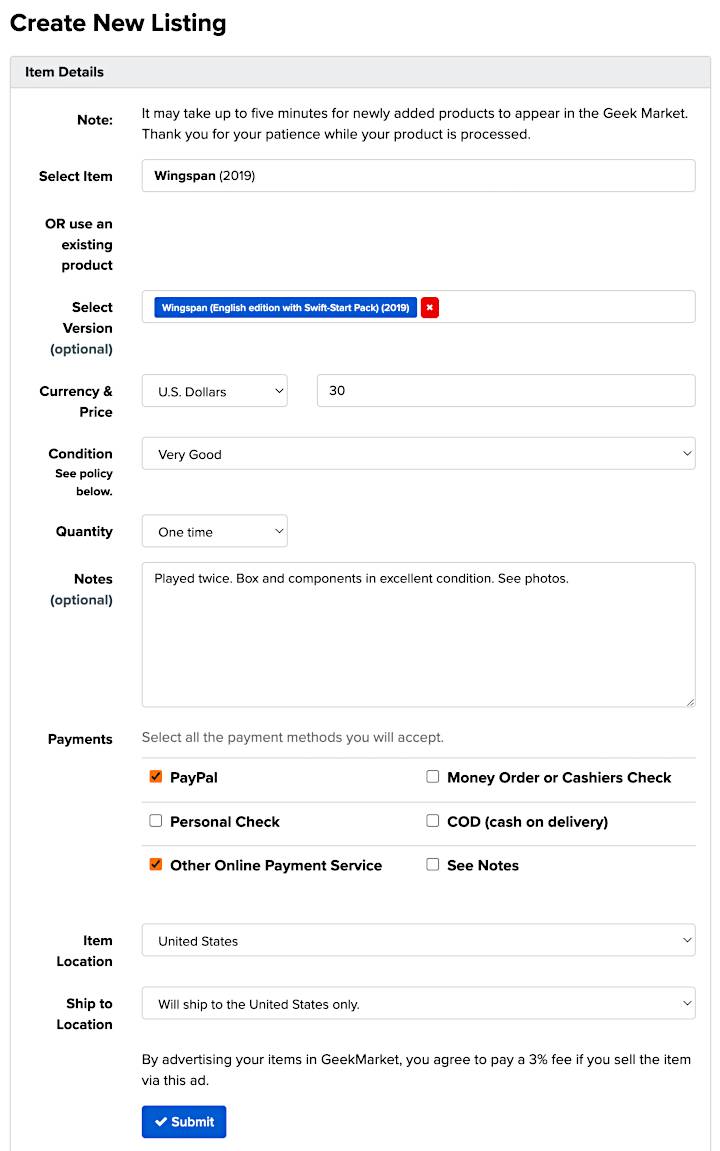
Here's how to fill out the listing details:
- Select Item: Type your game name and select it in the drop-down. If there are multiple games with the same name, make sure you choose the right one!
- Select Version: While this field is optional, you should fill it if you can because it will instill confidence in buyers and help your listing sell faster. Choose the exact version of your game! (If you don't know what the version is, head to the game's BGG page and navigate to the Versions section. Filter the versions by language, then find the one that matches your game.)
- Currency & Price: Use the price you determined in Step 1.
- Condition: Use the condition you determined in Step 1.
- Quantity: One-time.
- Notes: I like to mention how many times it was played. If there are any blemishes or damages, describe them. If there are any perks like extra accessories or upgraded components, describe them. Basically, include whatever you'd want to know as a buyer yourself. Be honest.
- Payments: Buyers overwhelmingly prefer PayPal, so make sure you're able to receive PayPal payments and check the "PayPal" box. If you also accept Venmo, Zelle, Cash App, etc. then check the "Other Online Payment Service" box. (See below on setting up Seller Notes, too.)
- Item Location: United States. If you live elsewhere, adjust accordingly.
- Ship to Location: Will ship to the United States only. If you're in the US, shipping outside of the US will be more expensive and incur extra fees. (I've shipped internationally a few times but it's a hassle and I don't do it anymore.)
Once you've filled out the listing details, click Submit. Done!
To see a list of all your active listings, go to the GeekMarket sidebar and click on the Selling section, then click on Manage Listings.
Adding Images to Your Listing
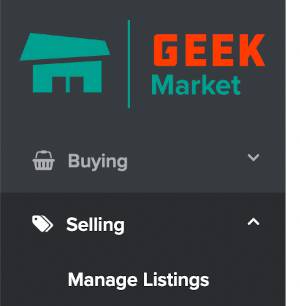
Once your listing is submitted, go to Manage Listings in the GeekMarket sidebar (under the Selling section) and click on the listing.
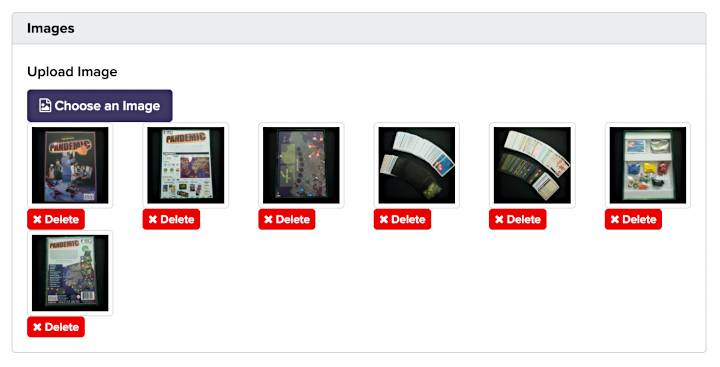
Scroll down to the Images section of the listing. It will be blank right now, but you should see a button labeled "Choose an Image." Click it to open up a file selector, then select one of the photos you took. This will upload the photo. GeekMarket's image selector can only handle one image at a time, so you'll have to repeat for every photo you took.
The last image you upload will be the first one in the listing. There's no way to rearrange the images once uploaded, so you should upload them in reverse order starting with the last one and ending with the first one.
Setting Up Your Seller Notes
When you create a listing, the Notes you enter only apply to that particular listing. Those notes should be reserved for game-specific details.
If you want to provide details that apply to ALL your listings (e.g., the payment methods you accept, shipping information, whether you're open to negotiation, etc.), then you should use the Seller Notes feature.
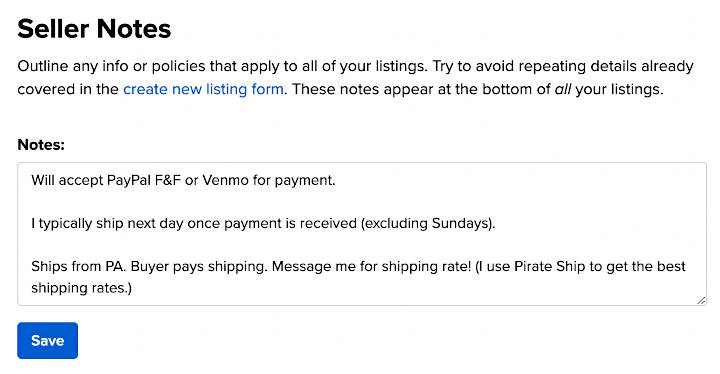
In the GeekMarket sidebar, open the Selling section and click on Seller Notes. Here, you can enter those universal details that apply to all your listings. (Seller Notes will appear at the very bottom of every listing.)
As of now, here's what my Seller Notes look like:
Will accept PayPal F&F or Venmo for payment.
I typically ship next day once payment is received (excluding Sundays).
Ships from PA. Buyer pays shipping. Message me for shipping rate! (I use Pirate Ship to get the best shipping rates.)
Step 4: Responding to Offers
Once your listings are live, it's a waiting game. Some games might attract attention within days, others might take months. Games that are ubiquitous and relatively undesirable (e.g., Fluxx, Munchkin, Exploding Kitten, etc.) might never sell. Regardless, you're now waiting for buyers to show interest. They'll do so by sending you a private message through BGG, known as GeekMail.
Which is why you should set up BGG email notifications. Whenever you get a GeekMail, you want to know as soon as possible so you can strike while the iron is still hot. If you wait too long, the buyer might cool and decide not to buy anymore.
Setting Up BGG Email Notifications
To set up BGG email notifications:
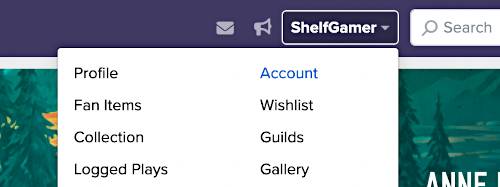
1. Navigate to your account settings. Go to BoardGameGeek and look at the top right for your username. Click your username, then click Account.
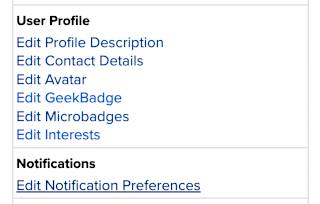
2. Open your notification preferences. Scroll down to the Notifications section of your account settings, then click Edit Notification Preferences.
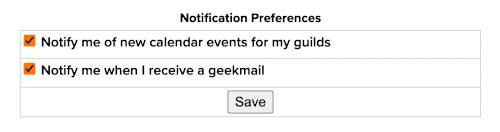
3. Enable GeekMail notifications. Make sure the checkbox labeled "Notify me when I receive a geekmail" is selected, then click Save.
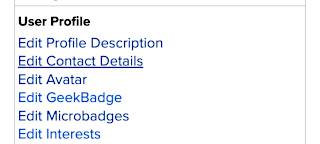
4. Open your contact details page. You'll need to make sure your BGG account is tied to the right email address. Navigate back to your account settings, scroll down to the User Profile section, then click Edit Contact Details.
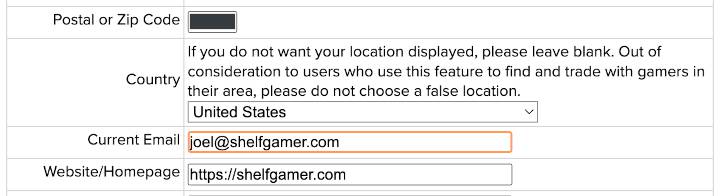
5. Confirm the right email address. Scroll down to the Current Email field and make sure it's one that you check regularly. Also make sure it's properly spelled. If you have to update it, click Submit at the bottom when you're done.
How to Reply to Buyer Inquiries
When someone messages you, head over to your GeekMail Inbox. The GeekMail system feels a lot like email with some minor quirks.
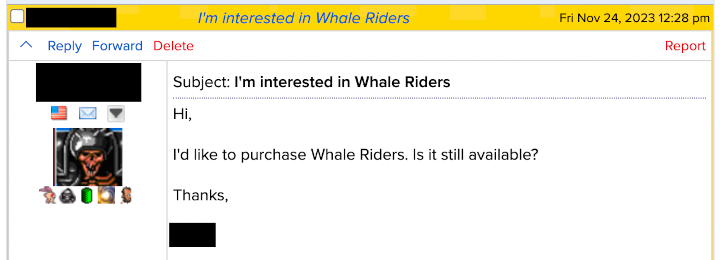
Click on the message to open it. The subject will usually be in the form of "I'm interested in [GAME NAME]" and the message body will usually be in the form of "Hello, is [GAME NAME] still available?" These are GeekMarket defaults.
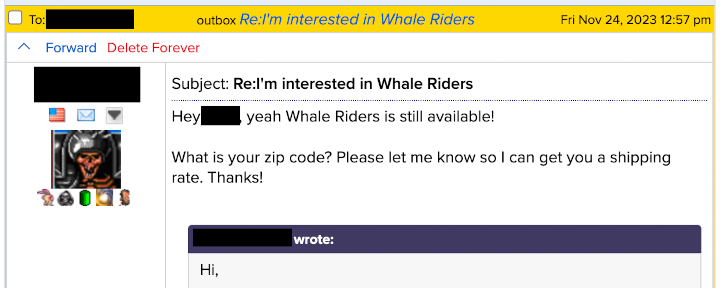
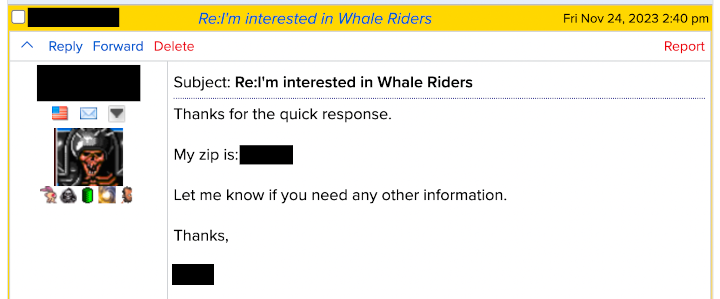
Initiate your first reply. Check that your game is still available. (It's possible you sold it already or traded it or gave it away but forgot to take down the listing.) If it is, let them know and ask for their shipping ZIP code so you can provide a shipping estimate. (More on how to get shipping estimates later below.)
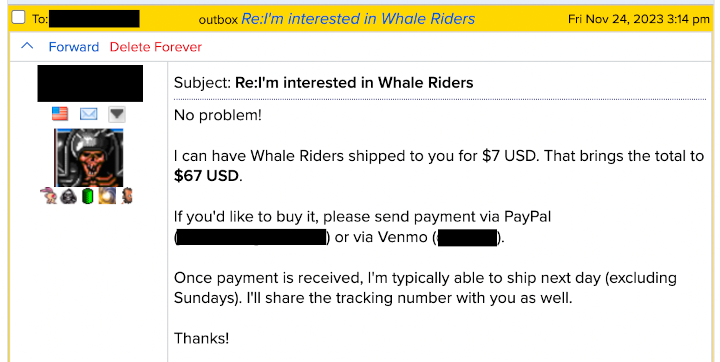
Provide a shipping estimate and payment details. Once they share their ZIP code with you, you can get a shipping estimate. The total price will be your listing price plus the shipping estimate. Let them know the total price and where to send payment (e.g., your PayPal address, your Venmo ID, etc.).
Do not ship the game until you receive payment! Some buyers are just putting out feelers and may ghost you if the price plus shipping exceeds their budget. Ghosting isn't unusual; don't take it personally.
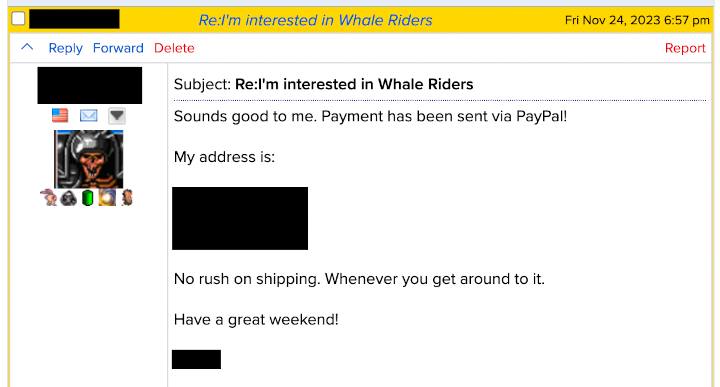
After receiving payment, confirm their shipping address. Send them a message to confirm that you've received their payment and ask them for their shipping address. If you received payment via PayPal, the payment details might include their shipping address already—but it's still a good idea to ask for confirmation.
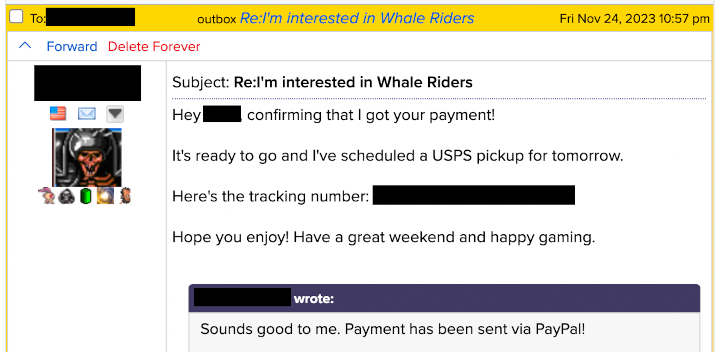
Once their shipping address is confirmed, ship it! With payment and shipping address in hand, the only thing left is to send the game out. After that, you should send one final message to let them know it's shipped + the shipment's tracking number.
These next steps will walk you through the shipping process.
Step 5: Packaging the Game
Shipping a package can be intimidating if you've never done it before, but it's a lot simpler than you might think, especially if you're shipping something as mundane as a board game. (Different story for electronics, perfumes, etc.)
To package and ship a board game, you'll need a few supplies:
- A box (see below)
- Packing tape (Amazon link)
- Bubble wrap (Amazon link)
- A digital scale (Amazon link)
- A yardstick (Amazon link)
These are affiliate links, so I'll earn a small commission if you buy these products using these links. I personally use these exact products when packaging and shipping board games! (If you don't like Amazon, you can probably find similar products at your local big-box store.)
You may not need to buy your own bubble wrap if you order lots of board games online and save the packaging materials that come your way. Retailers like Cardhaus and Game Nerdz pack their shipments well, and I've collected a lot of free bubble wrap this way.
Where to Source Free Boxes for Shipping
Shipping boxes aren't cheap, but that's okay because there are ways to get free boxes. (I have tons of boxes in reserve and haven't spent a single cent.)
1. Save boxes when you shop online. Whether you're buying stuff from Amazon, Target, Walmart, or online board game retailers, it's coming to you in a box—and those boxes are perfectly reusable. Save them!
2. Order free boxes from USPS. If you live near a US Postal Service, you might be able to head over and pick up free boxes there. Otherwise, you can order Priority Mail boxes for free through the USPS site. These boxes will be dropped off by your local postal carrier as they work their daily route.
The free boxes from USPS are for Priority Mail labels only. If you use Priority Mail boxes, you'll need to buy a Priority Mail label when it comes time to buy a shipping label in the next step.
Which box sizes should you order? Well, here are the ones I've found most useful when it comes to shipping modern board games:
- Priority Mail Box 1095 — The largest of the Priority Mail boxes. It fits the standard Ticket to Ride box size. No packing tape necessary because it has adhesive flaps. (Has a Cubic Tier of 0.4.)
- Priority Mail Box 1097 — A little bit smaller than Box 1095. Good for games that are slightly smaller than the standard Ticket to Ride box size but not small enough to be considered "small." No packing tape necessary because it has adhesive flaps. (Has a Cubic Tier of 0.3.)
- Priority Mail Box 1096L — Smaller than Box 1097. This one's for items like books and DVDs, so it's good for smaller board games. No packing tape necessary because it has tucking flaps. (Has a Cubic Tier of 0.1.)
- Priority Mail Flat Rate Padded Envelope — Alternative to Box 1096L, good for smaller games. This is a bubble mailer, which some buyers may not appreciate. Has a fixed price no matter where you ship (within the US). No packing tape necessary because it has an adhesive flap.
Generally, you should avoid Priority Mail Flat Rate boxes because they are overpriced. The one exception is the Priority Mail Flat Rate Padded Envelope, which is reasonably priced and works well for smaller games. More on pricing down below in the "Shipping Label" section.
How to Package Games Properly
The key is to start with the right box: the smallest box that fits the game yet leaves just enough room for the game to be wrapped in a layer of bubble wrap. If the box is too big, not only will you pay more for the shipping label, but you'll also end up wasting a lot more void fill (e.g., bubble wrap, air cushions, foam peanuts, etc.) to ensure the game is snug inside.
I have two goals whenever I package a game:
- Every side of the game box should be covered by bubble wrap.
- The game box shouldn't have much room to jostle around.
Once the game is wrapped in bubble wrap, you just have to fill the remaining space with air cushions, rolled-up sheets of bubble wrap, crumpled up balls of brown kraft paper, etc. Golden rule: If it's snug, it's safe.
It doesn't have to be super tightly packed, though. The shipping box itself will take the brunt of any impact during shipping, so the bubble wrap and air cushions are just there to minimize the game box bouncing around inside.
As long as the void is adequately filled, the game box won't get damaged. (A little bit of movement is perfectly fine. Just fill the void as well as you can.)
The last thing you need to do is seal the box with packing tape. A single, unbroken line of tape down the center between flaps is usually enough, but for heavier packages you might want to double up (or even triple up). For best integrity, the tape should circle the entire box and overlap itself.
If you use the aforementioned Priority Mail Boxes 1095, 1097, 1096L, or Priority Mail Flat Rate Padded Envelope, you don't need packing tape because all of these come with adhesive flaps or tucking flaps.
Step 6: The Shipping Label
Before you can buy a shipping label, you need to know three things:
- The shipping box dimensions.
- The shipping box weight.
- The destination shipping address.
This is where the yardstick and digital scale come into play.
When measuring the box dimensions, take the length, width, and height in inches. For fractional measurements, round down to the nearest 0.25 inch. (For example, if the length is 12.375 inches, round down to 12.25 inches.)
When weighing the box, round up to the nearest whole ounce. (For example, if the scale reads 2 pounds 4.4 ounces, count it as 2 pounds 5 ounces.)
Understanding Shipping Options
Shipping options, names, and terminology can be confusing. Fortunately, if you're only shipping board games within the US, you can ignore everything and focus your attention on the following:
- USPS Ground Advantage — Rates based on weight. Usually the cheapest option. Typically delivers in 2 to 5 business days. Includes USPS Tracking but no insurance. Important: You can't use Priority Mail boxes with a Ground Advantage label.
- USPS Priority Mail — Rates based on weight, size, and distance. Typically delivers in 1 to 3 business days. Includes USPS Tracking and up to $100 insurance. Can be used with Priority Mail and non-Priority Mail boxes.
- USPS Priority Mail Cubic — A special type of Priority Mail with rates based on box size regardless of weight. Ideal for smaller but heavier packages. Not available to regular customers, but you can get access to it through PirateShip (see below). Priority Mail Cubic is only available when shipping boxes within certain dimensions. (Priority Mail Boxes 1095, 1097, and 1096L all qualify for Priority Mail Cubic.)
- USPS Priority Mail Flat Rate — You pay a flat rate to ship a Priority Mail Flat Rate Box, no matter how much it weighs or how far it's going. Can only be used with specially marked Priority Mail Flat Rate Boxes. Typically overpriced. I highly discourage you from ever shipping via Flat Rate.
Using PirateShip
PirateShip is hands down the best way to buy shipping labels. It's free to create an account and it simplifies everything so much.
Not only does PirateShip provide discounted rates that are significantly cheaper than the rates you'd normally get, but it also simplifies the buying process. Once you input shipping details, it'll spit out all qualifying shipping label options and the costs for each one. The comparison table makes it easy to pick the cheapest one.
As of this writing, PirateShip only supports USPS and UPS labels. If you want to ship with another service (e.g., FedEx), you'll have to use another service. I ship 99% of my games using USPS via PirateShip.
After you've created your free PirateShip account, here are the steps to buying your very first shipping label:
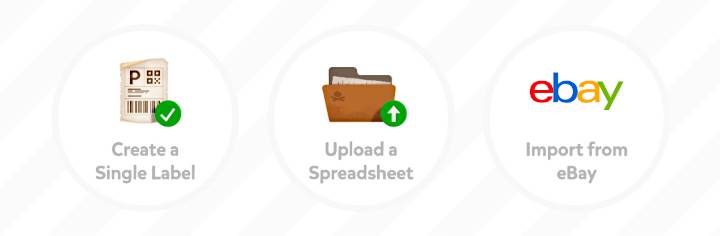
1. Create a Single Label. On the PirateShip dashboard, you'll see three buttons at the top of the screen. Click to create a single shipping label.
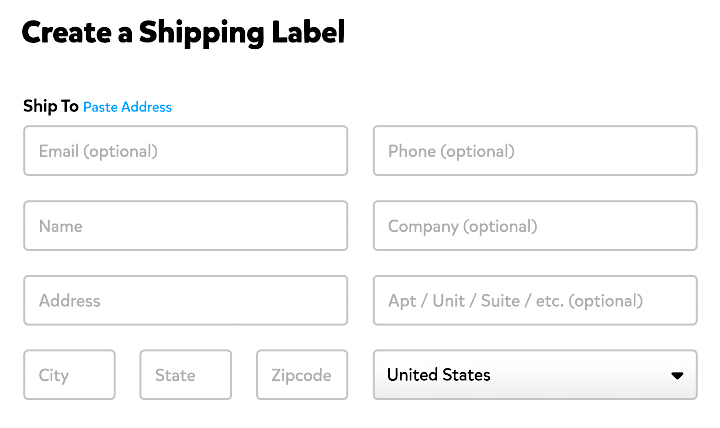
2. Fill out the destination shipping address. Make sure you type it in exactly as the buyer provided it to you. PirateShip may offer to autocomplete based on its database of addresses; if you do this, make 100% sure every detail matches.
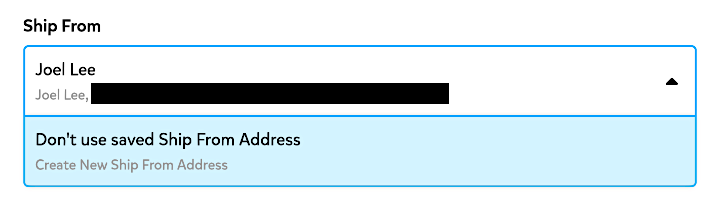
3. Fill out your address. If you don't have an address saved in PirateShip, use the Create New Ship From Address option to manually enter your address. (I recommend marking the Save Ship From Address checkbox to save this address so you don't have to fill it out every time you want to ship something.)

4. Fill out the package details. Input the shipping box dimensions that you measured earlier, along with the weight that you weighed earlier. You can ignore the Extra Services and Hazardous Materials options.
If you're shipping internationally, to a military APO/FPO, or to a US territory, you will need to fill out the Customs Form option. Otherwise, if you're shipping to one of the 50 US states, you can ignore it.
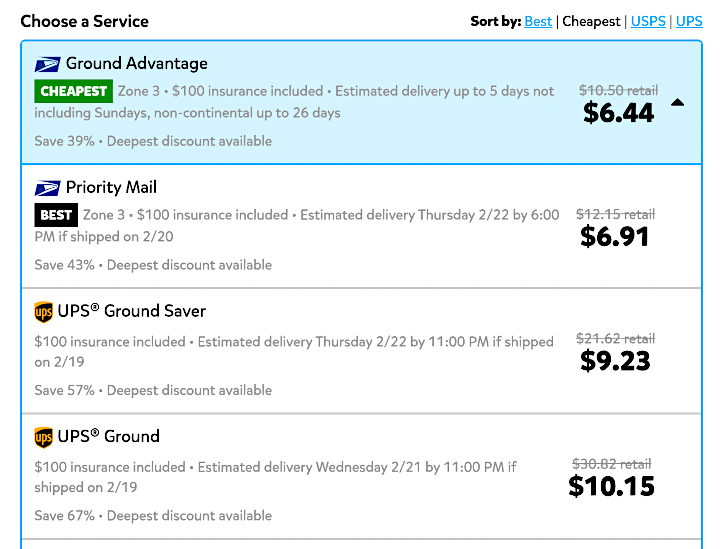
5. Click Get Rates. PirateShip will take in all the details and calculate shipping labels for you. Look through them and pick the one you want to use. Typically, I only look at Ground Advantage and Priority Mail options. Remember that Priority Mail boxes require Priority Mail or Priority Mail Cubic shipping labels!
6. Click Buy Label. This will charge you for the amount of the shipping label. You can pay with a bank account, a credit card, a PayPal account, or the balance on your PirateShip account. I ship often so I prefer to automatically reload my PirateShip balance when it drops below $0. (You can set this up in your account settings.)
7. Download the shipping label. Once you've bought the shipping label, you can click the Print Label button to view it. I suggest downloading it to your computer instead of printing it directly from your browser. (Since shipping labels are formatted differently than normal documents, they can be quirky to print.)
Printing the Shipping Label
Most shipping labels have a standard size of 4 inches by 6 inches. If you got your shipping label through PirateShip, it will have this size.
Once you've downloaded the shipping label, you'll need to print it. It will be in PDF format, so you should be able to use any PDF reader app to open and print it at home. (On Mac, the built-in Preview app can handle PDFs just fine. On Windows, I recommend the free and lightweight Sumatra PDF.)
When it comes to printing, you have two options:
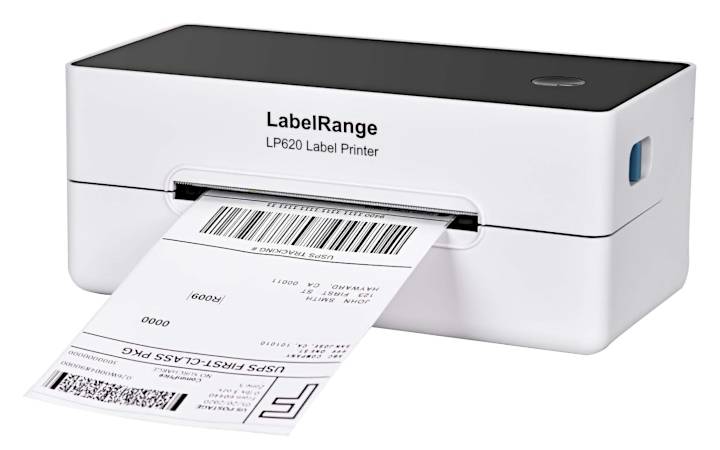
Option 1: Use a thermal shipping label printer. These are really convenient since you can just print out the label, peel it off, and stick it right on the box. The printer I use right now has been discontinued, but here's a similar one. Don't forget you'll also need to buy thermal shipping labels if you get a thermal label printer.
If you're going to sell or trade lots of used board games on an ongoing basis, I highly recommend getting a thermal shipping label printer! It's more convenient and provides a better end experience for the buyer.
Option 2: Use a regular printer. The 4x6 shipping label PDF can be printed on regular paper with a regular printer. Once printed, you can cut it down to size (or just fold the excess) before taping it to the box. To guard against weather, you might also want to cover the entire label in packing tape.
Step 7: Scheduling a Free USPS Pickup
Now that your package is ready, you need to have it shipped.
Did you know you don't have to drop off packages at the post office? Through the USPS site, you can schedule package pickups at your address—and this service is completely free. Once scheduled, just leave the package outside your door on the scheduled date and your postal carrier will take it.
Here's how to schedule a USPS pickup:
1. Create a free account on the USPS site. Technically, you don't have to do this—but if you don't, you'll have to manually fill out your address every time you submit a pickup request. If you create an account, it'll auto-populate. Way more convenient.
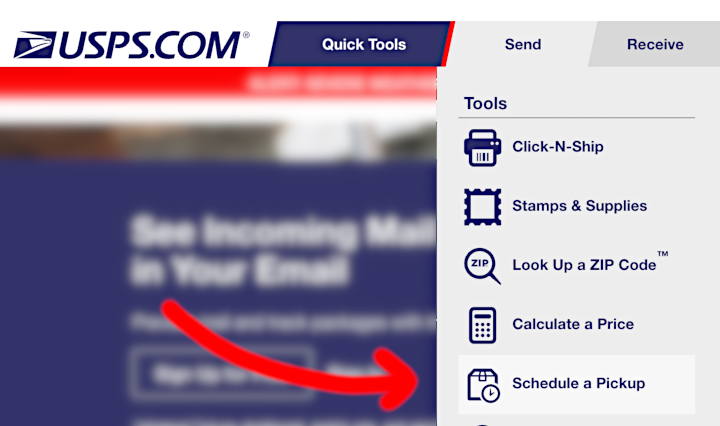
2. Go to the Schedule a Pickup page. In the top navigation of the USPS site, hover over Send and click on Schedule a Pickup. (Or click here.)

3. Fill in the pickup request details. You'll need to fill out your address, whether there's a dog at your address, and where you're going to leave the package. I always select "Front Door" and leave it just outside my door, but depending on your living situation you may need to adjust. Optionally, you can also leave specific instructions.
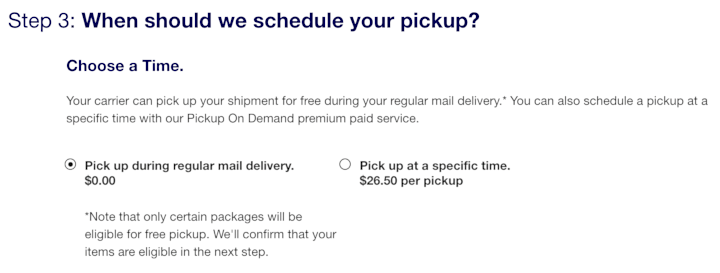
You'll also have to select a date for your pickup. If you want it picked up at a specific time, you'll have to pay—otherwise, you can choose to have it picked up as part of your regular mail delivery on a particular day, which is free.
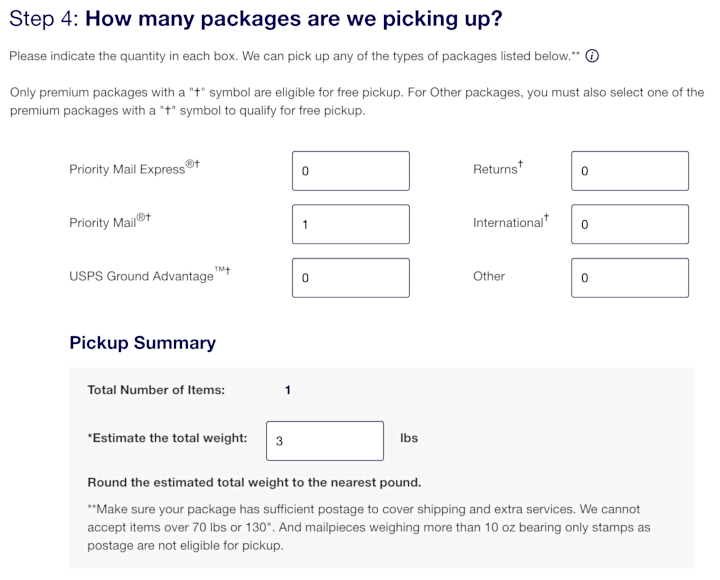
Lastly, you'll need to describe the package: what kind of shipping label is it (e.g., Ground Advantage or Priority Mail) and how much does it approximately weigh, rounded to the nearest pound. You can have multiple packages picked up, but make sure you fill out these fields correctly.
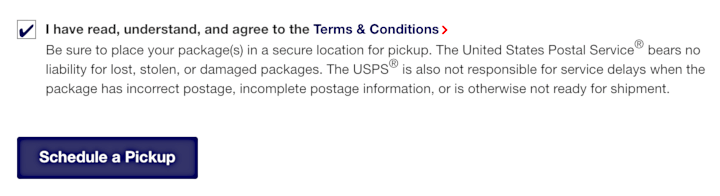
4. Submit the pickup request. Check the box about agreeing to the terms and conditions, then click the Schedule a Pickup button. Done!
Don't forget to leave the package where you said it'll be on the pickup date. You'll get an email confirmation when the package is picked up.
Step 8: Marking the Listing as Sold
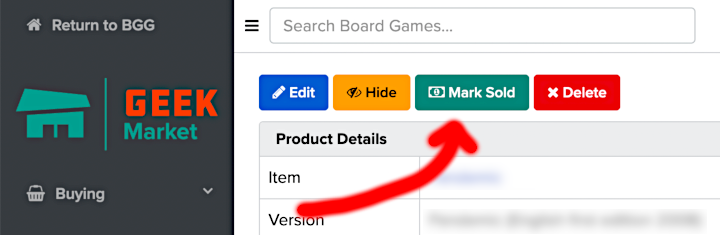
If you're an honorable person, you'll remember to go back to GeekMarket and mark your game as sold. This takes your listing off the market, increments the number of sold games on your BGG profile, and charges you the 3% fee for selling through BGG's GeekMarket.
You can't actually pay this fee until the total amount you owe crosses a $2 threshold, which might not happen until you sell a few games. Until then, the fees will accrue on your account. When the owed amount crosses $2, the "Pay with PayPal" button will appear.
Congrats! You've sold your first board game through BGG's GeekMarket.
Other Methods
If you went through all of the above and decided that it's too much of a hassle, there are two other potential methods for selling your used board games. (I haven't used these methods myself, so this isn't an endorsement.)
- Facebook Marketplace. If you want to sell locally and not worry about shipping, this is a popular option. Listing is free and you can avoid fees if you meet in person and accept payment in cash or apps like Venmo.
- Local board game stores. Some stores may have a consignment program where they'll sell your used games and take a cut of the sale. Other stores may offer to buy used games off of you, but you won't fetch nearly as much per game as you would if you sold directly to others.
- Noble Knight Games. Send a list of all the games you want to sell to Noble Knight Games and they'll make you an offer. They won't cherry-pick your games—it's all or nothing—and if you accept their offer, they'll email you a prepaid FedEx shipping label so you can ship your games to them. To learn more about this Buy-Sell-Trade program, click here.
And there you have it!
You now have the knowledge and confidence to sell your used board games online. I wish you luck in clearing your shelves, recouping your money, and sending your unplayed games to homes that will enjoy them.
If you have any questions about anything covered in this guide, please feel free to contact me. I'll do my best to answer them!
Is Your Collection
As Good As It Could Be?
These are the must-have board games I'd recommend if you want to build a worthwhile shelf of fun.
"15 Essential Board Games for Your Collection"
Free download, delivered instantly to your inbox.
No spam, ever. Unsubscribe in one click.